[HTML, CSS, JavaScript]그림판 만들기[2]
저번 까지는 선의 굵기 까지 정의했지만, 브러쉬의 모양을 바꿔보고 싶었습니다.
지금은 직선으로 그림을 그리지만, 원으로도 그림을 그릴수 있었으면 좋을것 같아 만들어보려고 합니다.
버튼 두개를 만들어주고 어떻게해야할까 고민을 해보았습니다.
변수를 만들어 줘야하나..? 직접 이벤트 리스너로 해줘야하나 고민이 들었습니다.
고민 오래해도 제가아는 정보에 한해서라면 빠른답이 나오지않으니 일단 아는대로 생각한대로 만들어 보겠습니다.
<!document html>
<html lang="ko">
    <head>
        <meta charset="UTF-8">
        <title>
            그림판 만들어보기
        </title>
        <link href="./assets/images/title-icon.png" rel="shortcut icon" type="image/x-icon">
        <link type="text/css" rel="stylesheet" href="css/style.css">
    </head>
    <body>
        <canvas id="canvas" width="500" height="500"></canvas>
        <div>
            <label for="slider">선 굵기</label><input type="range" min="1" max="100" value="10" id="slider" onchange="lineWidthReSizeForSlider()">
            <button type="button" onclick="lineWidthReSize('+')" >+1</button>
            <button type="button" onclick="lineWidthReSize('-')">-1</button>
            <div id="lindeWidth">10</div>
        </div>
        <div>
            <p>브러쉬 모양</p>
            <button type="button" name="brushType" onclick="brushTypeChange('line')"> / </button>
            <button type="button" name="brushType" onclick="brushTypeChange('circle')"> O </button>
        </div>
    <script type="text/javascript" src="js/canvas.js"></script>
    </body>
</html>
let canvas = document.getElementById('canvas');
let brush = canvas.getContext("2d");
let pastMouseX = 0
let pastMouseY = 0
let isDraw = false
let lineWidth = 10
let brushType = 'line'
function draw(mouseX, mouseY) {
if (isDraw){
if(brushType === 'line'){
brush.beginPath();
brush.lineWidth = lineWidth;
brush.strokeStyle = "green";
brush.moveTo(pastMouseX, pastMouseY);
brush.lineTo(mouseX, mouseY);
brush.stroke();
}else{
brush.beginPath();
brush.fillStyle = 'green'
brush.arc(mouseX, mouseY, 10, 0, Math.PI*2);
brush.closePath();
brush.fill();
}
}
pastMouseX = mouseX;
pastMouseY = mouseY;
}
canvas.addEventListener('mousedown', () => isDraw = true)
canvas.addEventListener('mouseup', () => isDraw = false)
canvas.addEventListener('mousemove', event => draw(event.offsetX, event.offsetY))
function lineWidthReSize(buttonType){
if(buttonType === '+') lineWidth++ ;
else{
if(lineWidth === 1){
alert('1이하로 줄일수 없습니다.')
}else{
lineWidth--
}
}
document.getElementById('lindeWidth').innerText = String(lineWidth)
}
function lineWidthReSizeForSlider(){
let sliderValue = document.getElementById('slider')
lineWidth = sliderValue.value;
document.getElementById('lindeWidth').innerText = String(lineWidth)
}
function brushTypeChange(brushTypeData){
brushType = brushTypeData
}또 새로운 변수를 만들어 줬습니다. brushType 이라는 변수를 만들어주고, 브러쉬의 모양에 따라 변하도록 설정해 주었습니다.
라인과 다르게 원의 모양으로 색을 칠하려면 arc() 라는 것을 써줘야하는데 제가 설명하는 것 보단 https://developer.mozilla.org/en-US/docs/Web/API/CanvasRenderingContext2D/arc 여기에 더 자세하게 설명이 되어있습니다.
이제 원으로 그리는 것까지 해봤으니 브러쉬 사이즈에 따라 원의 크기를 줄여줘야겠죠? arc의 세번째파라미터 값이 반지름의 값입니다.
그러니 10사이즈의 브러쉬로 그림을 그리고싶으면 세번째 파라미터의 값에 절반의 사이즈를 넣어줘야겠죠?
function draw(mouseX, mouseY) {
if (isDraw){
brush.beginPath();
if(brushType === 'line'){
brush.lineWidth = lineWidth;
brush.strokeStyle = "green";
brush.moveTo(pastMouseX, pastMouseY);
brush.lineTo(mouseX, mouseY);
brush.stroke();
}else{
brush.fillStyle = "green";
brush.arc(mouseX, mouseY, lineWidth/2, 0, Math.PI*2);
brush.closePath();
brush.fill();
}
}
pastMouseX = mouseX;
pastMouseY = mouseY;
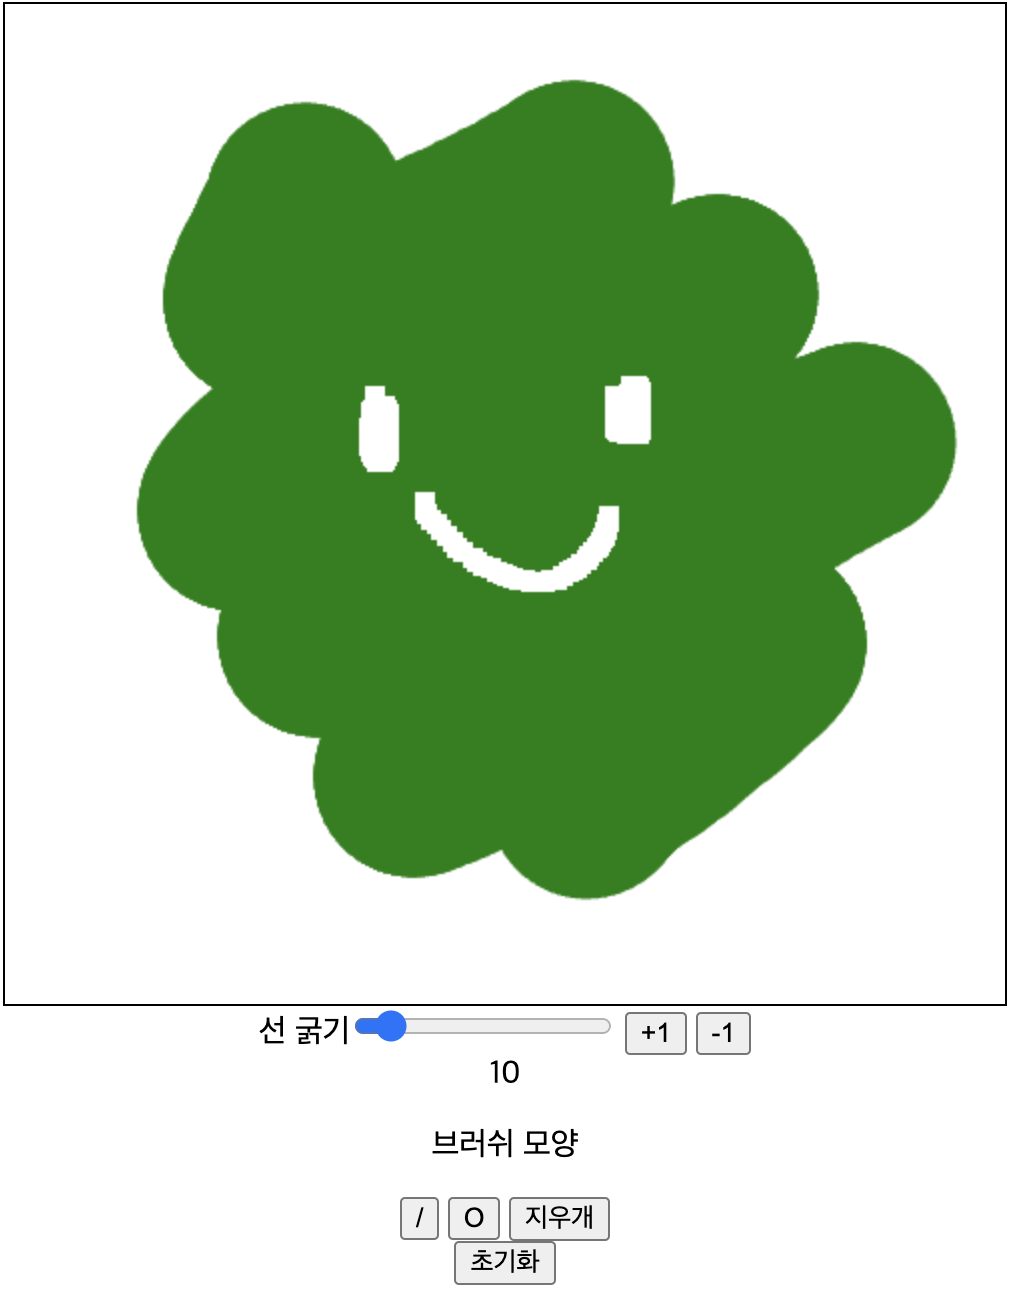
}타란~

근데 제가 사용하면서 슬라이더버튼이 onchange 이기떄문에 현재 브러시의 굵기가 몇인지를 보려면 버튼에서 손을 놔야했습니다.
불편하다고 느껴 수정해보도록하겠습니다.
간단하게 onchange를 oninput으로 수정해줘서 해결했습니다.
이제 그림을 그렸으니 초기화 하는 버튼이 있으면 좋겠다라는 생각이 들었습니다.
만들어보겠습니다.
지금부턴 모든 코드가 아닌 추가된 코드만 작성하려고합니다.
<button type="button" name="reset" onclick="canvasReset()">초기화</button>function canvasReset(){
brush.clearRect(0,0, canvas.width, canvas.height)
}clearRect로 간단하게 초기화를 시켜줬습니다. 비슷하게 지우개도 만들어 주겠습니다.
<button type="button" name="brushType" onclick="brushTypeChange('eraser')">지우개</button>function draw(mouseX, mouseY) {
if (isDraw){
brush.beginPath();
if(brushType === 'line'){
brush.lineWidth = lineWidth;
brush.strokeStyle = "green";
brush.moveTo(pastMouseX, pastMouseY);
brush.lineTo(mouseX, mouseY);
brush.stroke();
}else if(brushType === 'circle'){
brush.fillStyle = "green";
brush.arc(mouseX, mouseY, lineWidth/2, 0, Math.PI*2);
brush.closePath();
brush.fill();
}else{
brush.clearRect(mouseX,mouseY,lineWidth,lineWidth)
}
}
pastMouseX = mouseX;
pastMouseY = mouseY;
}
지우개와 초기화까지, 완료하였습니다!
그런데 지우개의 마우스 포인터가 가운데가 아니더라구요. 가운데로 만들어 주도록 하겠습니다.
brush.clearRect(mouseX-lineWidth/2,mouseY-lineWidth/2,lineWidth,lineWidth)

이제 진짜 중요한 그림판의 핵심이라고 할수있는 색상을 변경해주도록 할까요?
<div>
    <p>브러쉬 색상</p>
    <button type="button" name="brushColor" onclick="randomColor()">무작위 색상</button>
</div>
function draw(mouseX, mouseY) {
if (isDraw){
brush.beginPath();
if(brushType === 'line'){
brush.lineWidth = lineWidth;
brush.strokeStyle = brushColor;
brush.moveTo(pastMouseX, pastMouseY);
brush.lineTo(mouseX, mouseY);
brush.stroke();
}else if(brushType === 'circle'){
brush.fillStyle = brushColor;
brush.arc(mouseX, mouseY, lineWidth/2, 0, Math.PI*2);
brush.closePath();
brush.fill();
}else{
brush.clearRect(mouseX,mouseY,lineWidth,lineWidth)
}
}
pastMouseX = mouseX;
pastMouseY = mouseY;
}
function randomColor(){
brushColor = '#' + Math.round(Math.random() * 0xffffff).toString(16)
}
우선 랜덤한 색상으로 변경하는 것으로 만들어 줬습니다. 무작위 색상을 누르면 랜덤의 색상을 만들어서 brushColor에 저장해줍니다.


그리고 색상을 선택할수있는 color-picker가 있으면 좋을것 같아서 그거에 대한걸 찾아보던중 <input> 에 type을 color 로 설정하면 color-picker가 나오더라구요..! 저 처음알았어요
이렇게 하나를 배워가니 너무 재미있는것 같아요. 이맛에 개발하죠!
그럼 input type color로 설정을 해주고 그걸 색상에 입혀볼게요
<label>
    <input type="color" id="colorPicker" oninput="colorPicker()">
</label>
function colorPicker(){
brushColor = document.getElementById('colorPicker').value
}이렇게 설정을 해주니 원하는대로 색상이 변경이 됩니다. 근데 이제 무작위를 눌렀을때 어떤 색상인지 궁금하잖아요?!
input의 value를 무작위를 누르면 그 색상으로 변경되도록 다시 코딩을 해주겠습니다.
function randomColor(){
    brushColor = '#' + Math.round(Math.random() * 0xffffff).toString(16)
    document.getElementById('colorPicker').value = brushColor
}
randomColor를 이렇게 변경해줬습니다. 이제 중복되는 코드가 있으니 변수로 만들어주고 사용하도록 할게요

이제 뭐가 필요한지 고민해 보았더니 최근 사용한 색상들이 저장되어있으면 좋겠다라는 생각이 들었습니다.
5개를 기본으로 설정해보려고 합니다. 최근 사용한 색상들을 클릭하면 색상을 사용할 수 있게끔도 해봐야겠습니다.
그전에 페인팅기능을 만들어 보겠습니다. 화면을 원하는 색으로 가득 채우는 기능이죠
페인팅이라는 버튼을 하나 만들어주고, fillRect()를 사용해보도록 하겠습니다.
fillReact는 사각형을 그려주는 내장 메소드입니다.
<button type="button" name="brushType" onclick="brushTypeChange('painting')">페인팅</button>function draw(mouseX, mouseY) {
if (isDraw){
brush.beginPath();
brush.strokeStyle = brushColor;
brush.fillStyle = brushColor;
if(brushType === 'line'){
brush.lineWidth = lineWidth;
brush.moveTo(pastMouseX, pastMouseY);
brush.lineTo(mouseX, mouseY);
brush.stroke();
}else if(brushType === 'circle'){
brush.arc(mouseX, mouseY, lineWidth/2, 0, Math.PI*2);
brush.closePath();
brush.fill();
}else if(brushType === 'eraser'){
brush.clearRect(mouseX-lineWidth/2,mouseY-lineWidth/2,lineWidth,lineWidth)
}else{
brush.fillRect(0,0, canvas.width, canvas.height)
}
}
pastMouseX = mouseX;
pastMouseY = mouseY;
}이러면 페인팅까지 완료!
그럼 색상을 저장하는 걸 만들어 볼까요?
우선 저장할 배열을 하나 만들어 줬습니다
let colorPalette = []function randomColor(){
brushColor = '#' + Math.round(Math.random() * 0xffffff).toString(16)
colorInput.value = brushColor
stackColor(brushColor)
}
function colorPicker(){
brushColor = colorInput.value
}
document.getElementById('colorPicker').addEventListener('change', () => stackColor(colorInput.value))
function stackColor(colorData){
colorPalette.push(colorData)
console.log(colorPalette)
let addElement = document.getElementById('colorPalette')
for(let i =0; i < colorPalette.length; i++){
addElement.innerHTML += colorPalette[i]
}
}
컬러가 변화하는 시점에 stackColor 메소드를 만들고 작동하게 해줬어요.
이렇게하니까 변화가 일어날때마다 추가는 되지만, i가 다시 0부터 시작해서 중복되는 색상들이 생깁니다. 어떻게 해결을 할까 고민해봤는데 innerHTML을 초기화 시켜주기로 했습니다.
이렇게 해놓으니 해당 색상이 어떠한 색상인지 구분이 안가서 조금 수정 해주었습니다.
function stackColor(colorData){
    colorPalette.push(colorData)
    addElement.innerHTML = ''
    for(let i =0; i < colorPalette.length; i++){
        let bTag = document.createElement('b')
        bTag.innerText = colorPalette[i]
        bTag.style.color = colorPalette[i]
        addElement.appendChild(bTag)
    }
}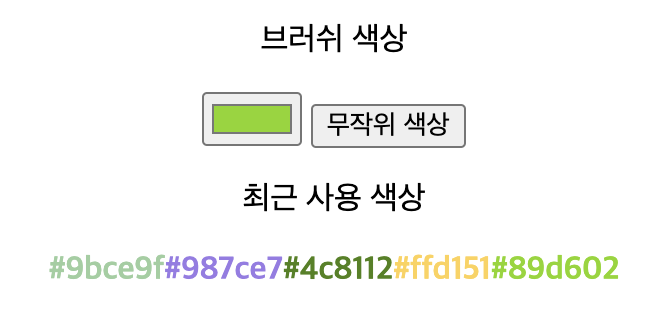
이제 글씨를 클릭하면, 해당 색상으로 변경되게 해주겠습니다.
function stackColorCLick(colorData){
    colorInput.value = colorData
}
다음과 같이 설정을 해줬는데
canvas.js:95 The specified value "rgb(151, 190, 172)"
does not conform to the required format.
The format is "#rrggbb" where rr, gg, bb are two-digit hexadecimal numbers.
다음과 같은 경고 메세지가 떴습니다. 형식이 달라서 일어난 일 같은데 콘솔로 찍어보니 rgb()로 되어있더라구요.
이걸 헥사값으로 변경시켜 줘야 할것 같습니다.
우선 숫자만 추출하기위해서, spilt과 map,replace를 사용하도록 하겠습니다.
function stackColorCLick(colorData){
   let rgb = colorData.split(' ').map((x) => x.replace(/[^0-9]/g,''))
    console.log(rgb)
    colorInput.value = colorData
}
이렇게 숫자만 나오게 되었죠? 이제 헥사값을 구해주면 됩니다!
function stackColorCLick(colorData){
   let rgb = colorData.split(' ').map((x) => parseInt(x.replace(/[^0-9]/g,''),10).toString(16))
    colorInput.value = "#" + rgb.join( "" );
    brushColor =  "#" + rgb.join( "" );
}
이렇게 구했는데, 문제가하나 있었습니다.

이렇게 헥사값이 1개인 값의 경우 rr,gg,bb 형식에 맞지않아 경고메세지가 뜹니다. 1개 인건 앞쪽에 0을 추가해 줘야할것 같습니다.
let rgb = colorData.split(' ').map((x) => parseInt(x.replace(/[^0-9]/g,''),10).toString(16).padStart(2,'0'))이렇게 추가해 줬습니다! 경고 메세지 없이 잘 뜨네요!
이제 저장을 5개로 제한해보겠습니다.
//첫번째로 실행한 방법
function stackColor(colorData){
    const colorPush = (color) => (colorPalette.push(color))

    if(colorPalette.length !== 5){
        colorPush(colorData)
    }else{
        colorPalette.shift()
        colorPush(colorData)
    }
    addElement.innerHTML = ''
    for(let i = 0; i < colorPalette.length; i++){
        let bTag = document.createElement('b')
        bTag.innerText = colorPalette[i]
        bTag.style.color = colorPalette[i]
        bTag.addEventListener('click', () => stackColorCLick(bTag.style.color))
        addElement.appendChild(bTag)
    }
}
첫번째로는 if문을 활용해서 colorpalette의 길이가 5일때면 맨 앞자리를 지워주고 push 하는 방법으로 했었다가
친구에게 이러한 방법으로 하는게 좋을지에 대해 물어봤는데, 그방법보단 slice를 활용하는게 좋을것 같다라는 의견을줘서 아래의 방법으로해결했습니다.
function stackColor(colorData){
    colorPalette.push(colorData)
    colorPalette= colorPalette.slice(-5)
    addElement.innerHTML = ''
    for(let i = 0; i < colorPalette.length; i++){
        let bTag = document.createElement('b')
        bTag.innerText = colorPalette[i]
        bTag.style.color = colorPalette[i]
        bTag.addEventListener('click', () => stackColorCLick(bTag.style.color))
        addElement.appendChild(bTag)
    }
}
이쁘게 꾸며주는건 마지막에 해보려고해요!!
이제 어떤 기능을 추가해볼지 고민해봤는데 색의 불투명도를 조절하고 싶었어요!
그래서 불투명도를 조절하는 기능을 만들었습니다.
<label for="opacitySlider">불투명도</label><input type="range" min="0.0" max="1.0" step="0.1" value="1" id="opacitySlider" oninput="opacitySetForSlider()">function opacitySetForSlider(){
let sliderValue = document.getElementById('opacitySlider')
globalAlpha = sliderValue.value;
document.getElementById('opacity').innerText = String(globalAlpha)
}
이제 그림을 저장하는 버튼을 만들어 주도록 할게요!
<a href="" download="myPainting.png">다운로드</a>document.querySelector('a').addEventListener('click', event =>
event.target.href = canvas.toDataURL()
);이렇게 해주면 그린 그림을 저장할수 있어요!
다음 글에선 css를 한번 입혀서 멋있는 그림판을 만들어보도록할게요!